Tired of paying high prices for name brand laundry soap? Not me. I have been making my own for years. This is my favorite DIY powdered laundry soap. It makes enough to last for months and costs less than $21.00 total. You have to try this one!
You will need this for your ingredients:
1) 4 pound box of Borax ($3.38)
1) 3 pound 7 ounce box of Arm & Hammer Super Washing Soda ($3.24)
1) 3 pound container of Oxi Clean ($2.73)
2) 14.1 ounce bars of Zote Soap ($0.97 each)
1) 4 pound box of Arm & Hammer Baking Soda ($2.24)
1) 55 ounce bottle of Crystals Fabric Softener ($8.96)
All ingredients were purchased at Walmart in the laundry aisle.
The cost for everything was $20.55 before tax.
Directions:
Grate the Zote Soap. I used a food processor. You can grate it by hand, or slice it and put it in the microwave for about 30 seconds and crumble it. Do it anyway you want, I just found the food processor to be the quickest and easiest way. You want it to look like pink shredded cheese.
This is what it should look like after grating.
Next you will want to layer your ingredients. Think of making lasagna. Once you have used all your ingredients in the layering process, it will look like this.
Now it is time to mix all of the ingredients. You can do it the old fashioned way with a big spoon and stir until you feel like your arm will fall off.
Or you can do it the easy way by pouring it into a garbage bag and rolling it back and forth.
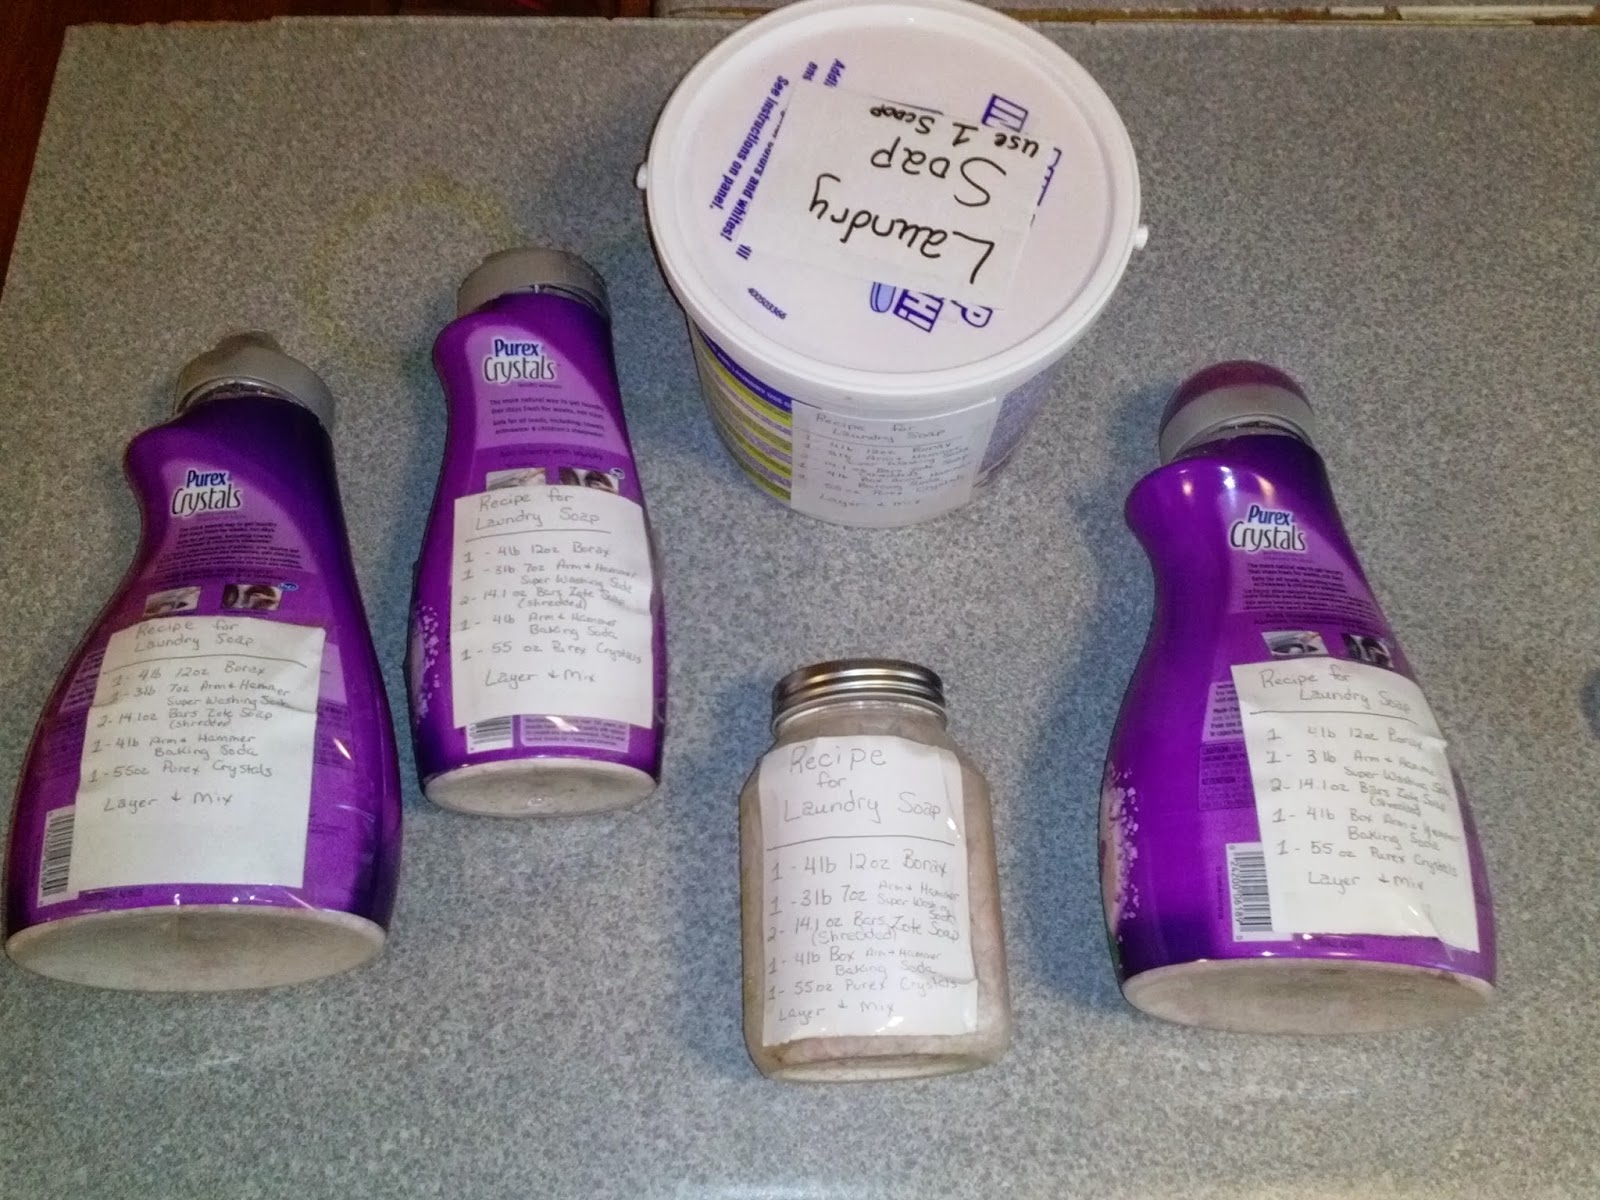
When you get it mixed well, fill your containers. I try to recycle my old ones by refilling them. I label the front with 'Laundry Soap' with directions on how to use.
I make a label with the ingredients for the back. This way, I know exactly how much and what types of ingredients are in it so I do not have to hunt for the recipe when I get ready to make more.
Now, how much to use per load? It only takes 2 tablespoons per load. I use the scoop that came in my oxi clean container. You can also use the lid from the Purex Crystals bottle. Fill to the middle line on the bottle lid.
You will be surprised by how much this makes and by how little it takes per load. It should last 6 - 12 months depending on how big your family is and how much laundry is done each day in your home.
It is safe to use on HE machines.
To make it easier and more fun to make, get a laundry soap making buddy. In my case, I went to Mom's and we made 2 batches. This way she had one and I had one to take home. We spent the day together AND got something done! Yay us!


